Creating Maps
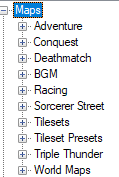
The Maps node contains your maps but also BGM, Tilesets and Tileset Presets. You can use Presets to assign every tile with a terrain, bonuses and other so you don’t have to redo it every map. SRW style maps are called Deathmatch maps. As for how to pick which map will be used when starting a new game, simply change the Content/Map path.ini file
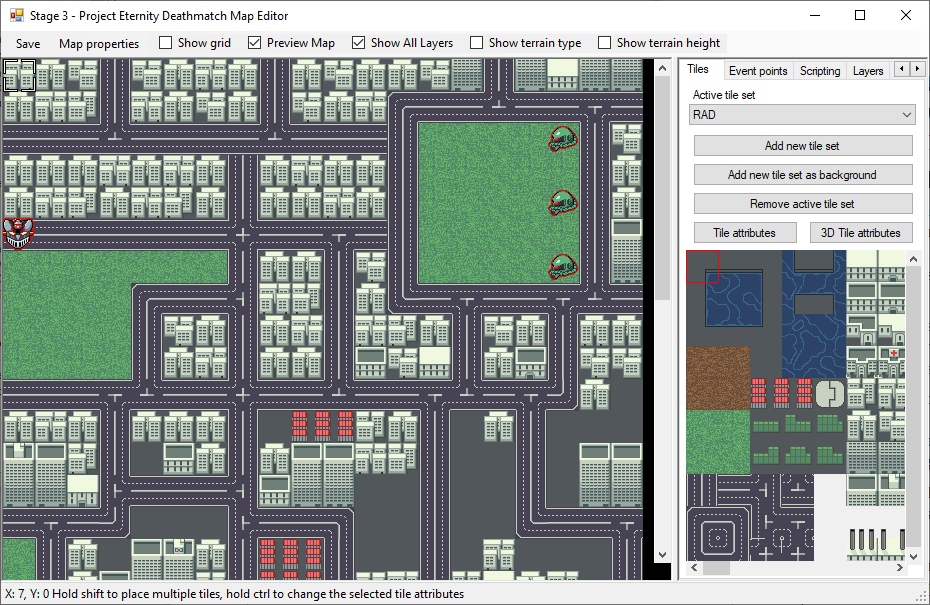
You can assign tiles to your grid, set spawn points and create events. The Layers, Props and Zones tabs allow for more fancy maps but will not be covered here. Let’s start with the properties. For a more in depth guide, go here.
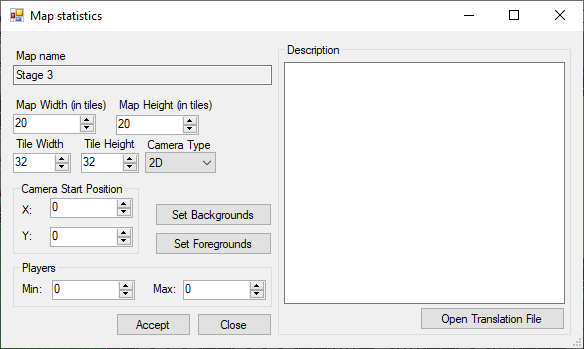
Map Width/Height: How many tiles there is in the grid. When expending it will use the current selected tile to fill the new lines/columns.
Tile Width/Height: You can change the size of the tiles, keep in mind that most assets are made for 32 x 32 and will need to be updated.
Camera type: 2D or 3D. 3D maps require more work and will not be covered in this tutorial.
Camera Start Position: Set where the camera will be when the map start.
Players: Only used for the multiplayer. This is also not covered.
Description: Description of the map. Currently only used for the multiplayer.
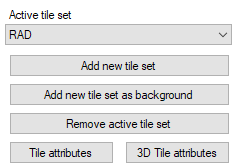
Active tileset: Change to switch the visible tileset at the bottom.
Add new tileset: Add a tileset from the existing ones in the dropdown list above. Can be an image or a tileset preset. Tilesets are in the Content\Maps\Tilesets folder and must be in .xnb format. Use TEdit if necessary to convert images to .xnb.
Add new tileset as background: Same as the other except it will paint the map with it for you. Remove active tiletset: Remove the tileset selected from the list. Will replaced every tiles using that tileset by the first one in the list.
Tiles attributes: Opens the tile attribute menu to edit the tile selected in the tileset. Every time this tile is place after will use those attribute.
3D tile attributes: Open the 3D tile attribute menu.
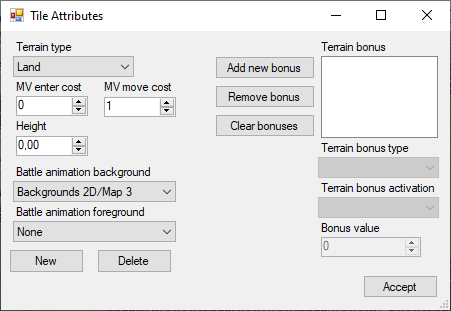
Terrain type: The type of the terrain. Air/Land/Sea/Space are the usual terrain that units with corresponding movement type can move to. Wall means you can’t shoot or move through it. Void is like air except you can’t move once inside, the gravity will make you fall until you hit land or die offmap.
MV enter cost: How many MV it cost to enter coming from a different terrain type. Like moving into water from land.
MV move cost: How many MV in cost to move between tiles of the same type.
Battle animation background/foreground: Specify a background or foreground to be used during the battle animations from the dropdown. The New button will let you add new backgrounds to both dropdowns and the Delete will delete the currently selected one.
Terrain Bonus: Add terrain bonus like HP regeneration and when it activate, such as once every turn.
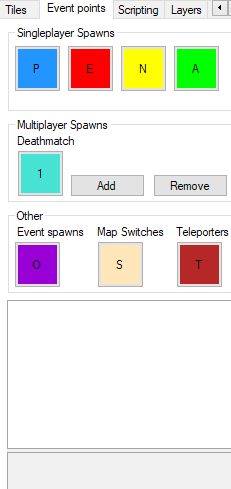
Event Points: Select a button and then click on the map to add it.
Singleplayer spawns: Use P spawns to decide where the player will spawn its units after a loadout. E is for enemy, N for neutral, A for allies. They don’t offer any special features and are just used to spawn units from a cutscene.
Multiplayer Spawns: Used for team deathmatch multiplayer.
Event spawns: Used by cutscenes to check positions.
Map switches: Allow a unit to switch between multiple maps. Won’t be covered in this guide.
Teleporters: Teleport the unit and cursor by going over it.
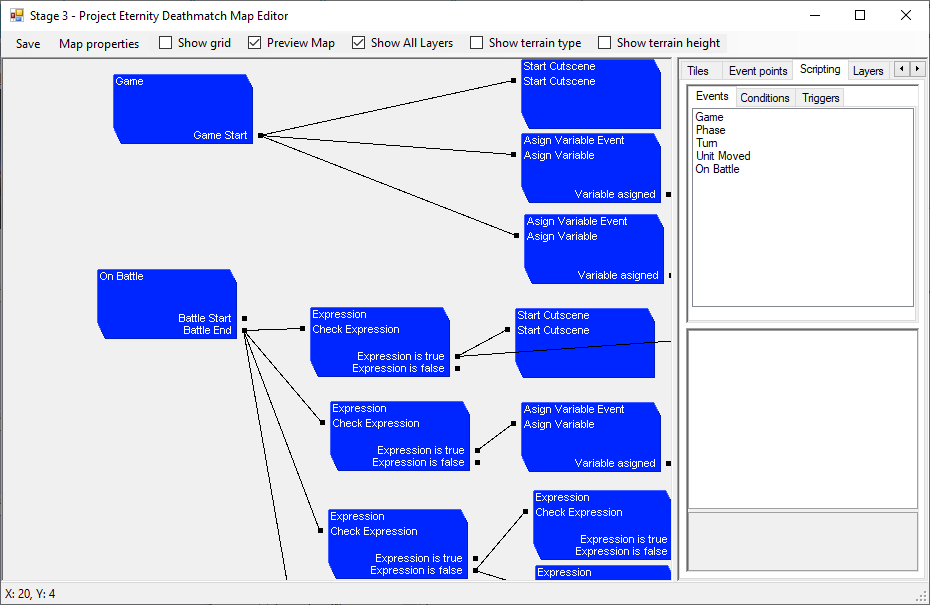
Scripting: Hide the map to display the scripts. Double click on an item from the list on the right to spawn it. Drag lines between the points to connect scripts together. The first script of any map is Game Start → Start Cutscene. The behavior is mostly the same as the cutscene editor so you can use the cutscene part of this guide for more details.
Events: Map events automatically called by the game. Conditions: Mostly used to check expressions using the Formula Parser. You can check if every enemies are dead and others.
Triggers: Mostly used to start cutscenes which allow more flexibility. Can also store variables for complex scripting.