Creating Visual Novels
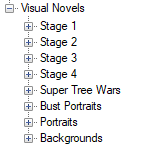
To create dialog you’ll need to use the Visual Novels node. You can see your VN as well as portraits and backgrounds in your Content/Visual Novels folder. Because it’s a standalone editor, it is possible to create VN entirely by hand by handpicking portraits for each dialog but you can also use the characters created before instead. It’s entirely possible to create a non-linear dialog as well, we won’t go into details but we’ll cover it a bit.
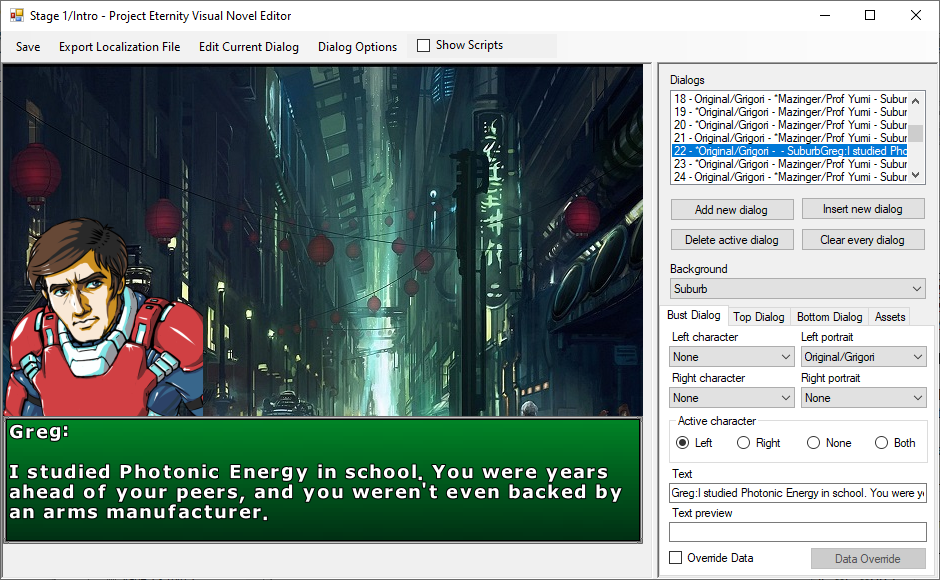
You can create dialog panels, select portraits, backgrounds, do some scripting, change music and change where the camera will move on its own. The bust dialog is for full picture portrait or animations created with the animation editor. Top and bottom dialog are for classic old school dialog with a small picture and work the same and won’t be covered. The asset tab is where you’ll populate the dropdowns from the other tabs. Checking the Show Scripts box will allow you to reorder dialogs and do non linear dialog. For a more in depth guide, go here.
Export Localization file: Export the visual novel as text to make it easier for other people to translate.
Edit Current Dialog: Open a dialog that allow you to use cutscenes directly from inside the VN editor.
Dialog Options: Select BGM or SFX to play when reaching that dialog. It will actually create a play BGM and SFX script inside a cutscene and can be accessed from the Edit Current Dialog menu as well.
Dialogs: The list of the dialog created with a summary text that following this logic: [Order number] - [* if talking][Left character] - [* if talking][Right character] - [Background] – [Text]. Keep an eye on the order number if you move dialog in the scripts section.
Bust Dialog: Choose who you want to be talking and on which side. Clicking in the Text texbox will open a new window to properly be able to write multiple lines. The text preview is only used if linking multiple dialog from the script menu.
Override Data: Normally if you choose a character to talk the camera will automatically move on it or wherever it was customized to but you can override that behavior to make it move to a different place or not move at all.
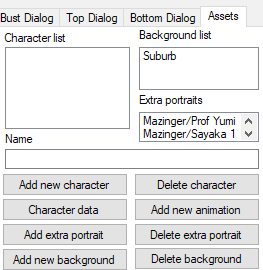
Assets: List of assets to use in the VN. You need to fill it before doing anything.
Add new Character: Add a character to the list.
Character Data: Customize where the camera will go when the character is talking. For example where to put the camera if the character is not on the map.
Add new animation: Add an animation as an extra portrait. You’ll have to ensure the animation origin is at the right place but the engine will flip it and shadow it for you as needed.
Add extra portrait: Add a sprite as an extra portrait. If you’re not using characters extra portraits are the only way to have portraits.
Add new background: Add a new background to the list.
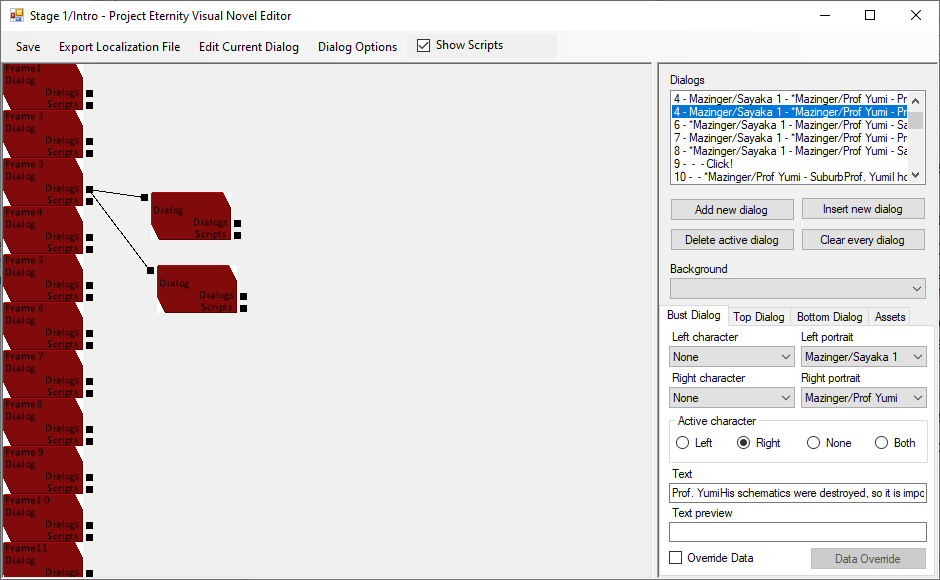
Scripts: When you check the Show script checkbox at the top you are greeted with red boxes representing each a dialog from the dialog list. You can click on one to also select the corresponding one in the regular Dialog list on the right. You can drag boxes around and you can hold Alt and drag click to scroll up and down.
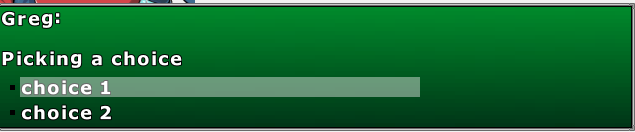
Linking dialog: You can link boxes together as shown above to create a choice. The text visible in the choice will be based on the Text Preview field of the dialog. You can then use the Edit Current dialog button at the top to execute scripts when the choice is picked on each choice. This way you can save the choice the player took each time.
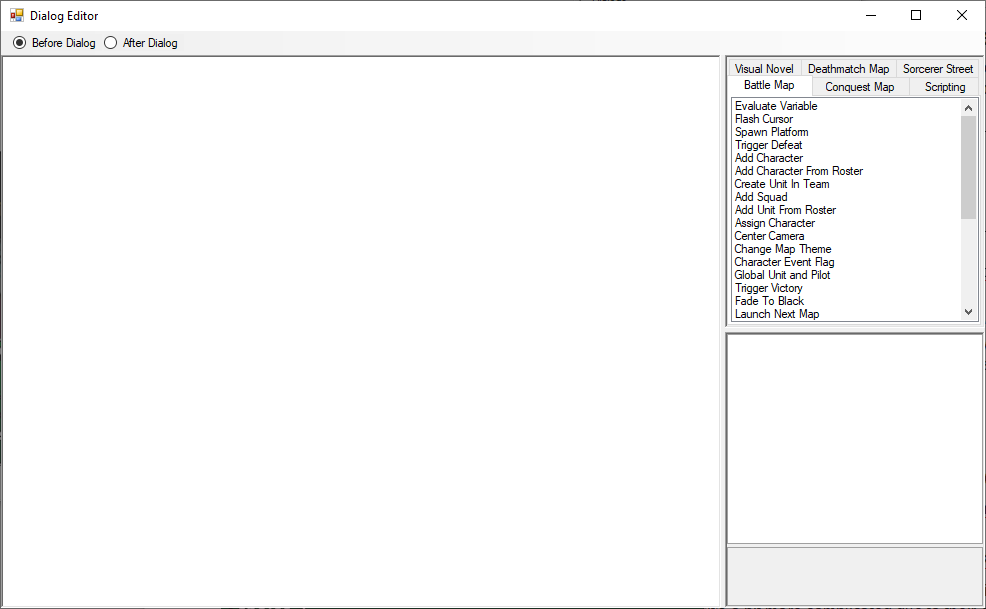
Edit Current Dialog: After pressing this button you’ll open the dialog editor. We won’t cover how to make scripts as it is covered by the Cutscene editor but you’ll need to know the different between the Before Dialog and After Dialog choices at the top.
Before Dialog: This cutscene is executed when the player enter this particular dialog for the first time. This is usually where you do your scripting.
After Dialog: This cutscene is executed when the player exist this dialog to go for another one. This is particularly useful in the parent dialog of multiple choices. If you want to play music when the player pick a choice, you can do it here in a single dialog instead of starting music in each choice to cover all everything.